Essential Tips for Flawless Cabinet Refinishing
Are your kitchen cabinets looking outdated or worn? Cabinet refinishing can breathe new life into your space, but achieving a flawless finish requires careful attention. In this blog post, I will share essential tips, covering crucial preparations, effective cleaning techniques, and the right products to use. By following these insights, you will not only enhance the appearance of your cabinets but also save time and money on future repairs. Let’s tackle the common pitfalls of cabinet refinishing together, ensuring your project exceeds expectations.
Essential Preparations for Cabinet Refinishing

Before I begin the refinishing process for kitchen cabinets, I always assess the current condition of the cabinetry. This step is crucial for identifying issues like water damage or surface wear. Gathering the right tools and materials is next; I make sure to include abrasives and finishes that suit the project. Finally, I set up a proper workspace to ensure a clean and organized environment, making the entire refinishing task more efficient.
Assess the Current Condition of Cabinets
When I assess the current condition of cabinets, I pay close attention to any signs of wear, such as scratches or water damage, that could impact the refinishing process. I often use a sponge to gently clean the surface, removing dust and debris to reveal any hidden imperfections. This initial evaluation helps me determine the right refinishing services to recommend, ensuring that the results meet both the aesthetic and functional needs of the space.
Gather Necessary Tools and Materials
Gathering the necessary tools and materials is foundational for a successful cabinet refinishing project. I ensure my gear includes high-quality foam brushes for smooth application of primer and finishes, a reliable vacuum to remove dust from the surfaces, and durable sanding materials to prepare the cabinets properly. By sourcing products from hudson paint contracting, I can guarantee that I am equipped with supplies that meet professional standards, setting the stage for a flawless refinishing outcome.
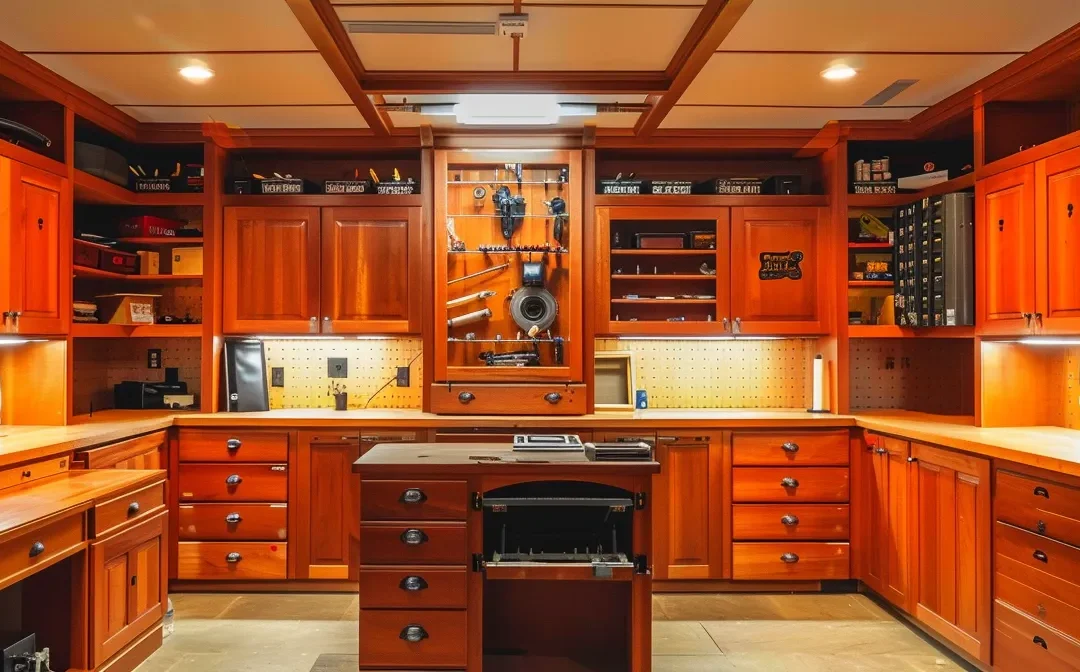
Ensure a Proper Workspace Setup
Ensuring a proper workspace setup is vital for successful cabinet refinishing. I always choose a well-ventilated area where I have ample space to maneuver my tools, such as a random orbital sander, while keeping the environment dust-free. Using a drop cloth helps protect the surrounding surfaces, and I have all materials, including brushes and coats, within reach to streamline the process of furniture refinishing in areas like the bathroom.
- Assess the current condition of cabinets.
- Gather necessary tools and materials.
- Ensure a proper workspace setup.
With your cabinets prepped, it’s time to focus on what comes next. Effective cleaning will ensure a smooth finish and lasting beauty.
Effective Cleaning Techniques for Cabinets

I utilize appropriate cleaning solutions that effectively tackle grease and residues on cabinets, ensuring a clean surface for refinishing. Before moving on, I make sure to thoroughly dry the cabinets. This step is essential, especially when working with oak, to avoid any issues with stain absorption or filler application. Each technique contributes to a successful home improvement project.
Utilize Appropriate Cleaning Solutions
I always prioritize using suitable cleaning solutions that effectively eliminate grease and grime from cabinet surfaces. I prefer products that are safe for the wood grain and can tackle any lingering mold, ensuring a smooth refinishing process. For added protection, I recommend wearing a respirator while cleaning to prevent inhalation of any harmful particles, especially when handling any plastic components or surfaces.
- Choose cleaning solutions safe for wood grain.
- Eliminate grease and grime effectively.
- Wear a respirator for protection against harmful particles.
- Address mold issues promptly to avoid complications.
- Protect plastic components during the cleaning process.
Remove Grease and Residues Thoroughly
To ensure flawless cabinet refinishing, I focus on thoroughly removing grease and residues from surfaces. Using a mixture of appropriate cleaning solutions, I effectively eliminate stubborn grime, which is essential before applying wood putty or polyurethane finishes. A clean surface allows the finishes to adhere properly, enhancing the durability of any interior painting or door refinishing services I provide.
Dry Cabinets Completely Before Proceeding
Before I proceed with refinishing cabinets, I make it a priority to dry them completely after cleaning. Using a gentle soap solution, I remove any remaining residue and then wipe the surfaces, allowing ample time for evaporation, especially around hinges where moisture can linger. This thorough drying process is crucial, as any excess water can compromise the adhesion of new finishes and impact the overall quality of the cabinet refacing project.
Cleaning your cabinets readies them for the next step. Sanding them down will create a flawless surface, perfect for what comes next.
Sanding Cabinets for a Smooth Finish

Choosing the right sandpaper grit is vital for effectively stripping away wear and preparing the surface for refinishing. I employ proper sanding techniques to achieve a smooth finish and ensure I remove all dust afterward to prevent imperfections. These steps are crucial, especially when preparing cabinets for an oil finish or dealing with caulk in a kitchen remodel.
Choose the Right Sandpaper Grit
Choosing the right sandpaper grit is essential for achieving a smooth finish during cabinet refinishing. I typically start with a medium grit, such as 120, to remove any old finishes or rough spots, followed by a finer grit, like 220, for a polished look. It’s important to wearpersonal protective equipment, such as a mask and goggles, while sanding to avoid inhaling dust and to protect your eyes during this process:
- Begin with medium grit sandpaper to strip old finishes.
- Use finer grit sandpaper for a polished surface.
- Prioritize safety with personal protective equipment.
- Maintain even pressure to prevent gouges or uneven spots.
- Clean the surface thoroughly after sanding to prepare for painting services.
Follow Proper Sanding Techniques
When I focus on proper sanding techniques in kitchen cabinet refinishing, I prioritize the removal of wear and tear using a systematic approach. Starting with the appropriate grit, I ensure that I strip away any old finishes without damaging the wood‘s integrity. By maintaining even pressure and moving with the grain, I can achieve a smooth surface that prepares the cabinetry for a factory-like finish and enhances the overall aesthetic of any woodworking project.
Remove Dust After Sanding
After sanding kitchen cabinets, I make it a priority to remove all dust thoroughly to ensure a smooth surface for refinishing. I typically use a wool cloth to capture fine particles effectively, which prevents imperfections in the cabinet painting process. This step is crucial, especially when applying a paint stripper or finish, as any remaining dust can hinder adhesion and affect the overall quality of the renovation.
The cabinets now stand smooth and ready. Next, we must choose the right primer to ensure a lasting finish.
Selecting the Right Primer for Best Results

Selecting the right primer is essential for cabinet refinishing success. I focus on understanding different types of primers to ensure compatibility with surfaces like steel and varnish. Applying primer evenly is crucial for optimal coverage, and allowing sufficient drying time enhances the final results. These steps are key to achieving a high-quality finish that cabinet painters can rely on.
Understand Different Types of Primers
When selecting primers for cabinet refinishing, I focus on the type that suits the surface and the desired finish. Two common options are oil-based and water-based primers; oil-based primers provide excellent adhesion on problematic surfaces while being durable, though they may emit stronger odors. On the other hand, I often choose environmentally friendly water-based primers for their lower emissions and ease of cleanup, ensuring I prepare the surfaces by removing dirt and dust with a tack cloth before application for optimal results:
- Evaluate surface type to choose the right primer.
- Consider environmentally friendly options for safer use.
- Use a tack cloth to ensure surfaces are clean before priming.
- Utilize a brush for even primer application.
- Check the drying time for the best beauty in the final finish.
Apply Primer Evenly for Optimal Coverage
When applying primer for cabinet refinishing, I focus on achieving even coverage across all surfaces, including drawers and doors. Using a high-quality brush and taking the time to work the primer in with a smooth motion ensures that I avoid drips and runs. It’s essential to apply the primer in thin layers, allowing each coat to dry fully before sanding with fine sandpaper, which helps create a flawless surface for the following paint application:
| Step | Description |
|---|---|
| 1. Choose the Right Primer | Select a primer suited for the cabinet material, whether wood, laminate, or metal. |
| 2. Prepare Surfaces | Ensure cabinets are clean and free from dust before application. |
| 3. Use Proper Tools | Utilize a high-quality brush for even application. |
| 4. Apply Thin Layers | Work the primer into the surfaces in thin, even coats. |
| 5. Allow to Dry | Let each coat dry completely before sanding lightly with sandpaper. |
Allow Sufficient Drying Time
Allowing sufficient drying time between primer coats is critical in the cabinet refinishing process. I make it a point to adhere to the manufacturer’s recommended drying time, which can vary based on the primer type and environmental conditions. Once the primer is dry, I opt to lightly sand the surface with fine sandpaper before applying additional coats, ensuring a smooth and even base for the final finish.
Now that you’ve laid a solid foundation with the right primer, it’s time to consider the paint that will bring your cabinets to life. Choosing the right color and finish can transform your space, sparking joy every time you enter the room.
Choosing the Right Paint for Cabinets

In cabinet refinishing, selecting the right paint is vital for achieving a professional finish. I recommend exploring different paint finishes to find the one that best suits your cabinetry. Additionally, considering color options and current trends can enhance the visual appeal of your space. Finally, assessing paint durability and cleanability ensures that your cabinets will withstand daily wear while remaining easy to maintain.
Explore Different Paint Finishes
When I explore different paint finishes for cabinets, I consider the specific needs of each project. High-gloss finishes offer a reflective appeal and are easy to clean, making them ideal for kitchens. On the other hand, satin finishes provide a softer look while still being practical, perfect for serious traffic areas where durability and aesthetic blend seamlessly:
- High-gloss finishes provide a reflective appeal.
- Satin finishes offer a softer look and are durable.
- Consider the room’s function when selecting a paint finish.
- Matching paint finishes to cabinetry style enhances overall visual appeal.
Consider Color Options and Trends
In my experience with cabinet refinishing, selecting the right color can significantly transform the overall look of your kitchen or bathroom. I recommend looking at current trends while also considering your personal style to create a cohesive appearance. Lighter shades often make spaces feel more open and inviting, while darker tones can add a touch of sophistication and warmth, providing a balance between aesthetics and functionality.
Assess Paint Durability and Cleanability
When I assess paint durability and cleanability, I prioritize choosing products that can endure the rigors of daily use while being easy to maintain. I look for paints specifically formulated for cabinetry, as these often have superior adhesion and resistance to stains and scratches. Conducting a test on a small area helps gauge how well the paint holds up over time and how effortlessly it can be cleaned, ensuring my clients enjoy long-lasting results without excessive upkeep.
| Considerations | Details |
|---|---|
| Durability | Opt for paints with excellent adhesion and resistance to scratches and stains. |
| Cleanability | Select finishes that can be easily wiped down without damage. |
| Testing | Conduct small area tests to evaluate performance before full application. |
| Material Compatibility | Ensure the paint is specifically designed for cabinetry to achieve the best results. |
The right paint sets the stage, but the finish leaves the lasting impression. Let’s focus on the final touches that will elevate your cabinets to perfection.
Final Touches for a Flawless Cabinet Finish

I always take the final steps in cabinet refinishing seriously to ensure optimal results. First, I inspect for imperfections before applying any final coats, ensuring a flawless look. Next, I emphasize the importance of adding a protective topcoat to enhance durability. Finally, allowing full curing time before use is essential to preserve the finish and maintain its quality long-term.
Inspect for Imperfections Before Final Coats
Before applying any final coats in cabinet refinishing, I meticulously inspect for imperfections that could mar the finish. I look for areas with uneven texture, dust particles, or minor blemishes that might not be visible at first glance. Addressing these issues ensures that the end result meets high standards and leaves clients completely satisfied with their newly refinished cabinets:
- Conduct a thorough visual inspection for defects.
- Identify uneven textures or dust particles that can affect the finish.
- Make necessary repairs to ensure a smooth application of final coats.
Apply a Protective Topcoat
Applying a protective topcoat is a critical step in achieving a lasting finish on your cabinets. I always select a high-quality topcoat that enhances durability and provides resistance against scratches and stains, ensuring that my clients’ cabinetry remains beautiful over time. This final layer safeguards the refinished surface, allowing clients to enjoy their refreshed space without worrying about wear from daily use, making it an essential part of the cabinet refinishing process.
Allow Full Curing Time Before Use
Allowing full curing time before using the cabinets is vital to achieving a lasting finish in my refinishing projects. After applying the final coats, I make sure to let the cabinets cure for the recommended time—often several days—depending on the products used. This waiting period ensures that the finishes fully adhere and harden, preventing damage and maintaining the quality of the cabinetry as my clients enjoy their refreshed spaces:
- Inspect for imperfections before applying final coats.
- Apply a protective topcoat for enhanced durability.
- Allow full curing time before using the cabinets.
Achieving Flawless Cabinet Refinishing: Key Takeaways and Tips
Flawless cabinet refinishing hinges on careful preparation, effective cleaning, and meticulous application techniques. By assessing the condition of cabinets and gathering the right tools, I set the stage for a successful transformation. Paying attention to surface preparation and selecting appropriate primers and paints ensures durability and aesthetic appeal. Following these essential tips empowers you to achieve remarkable results that enhance both functionality and beauty in your space.