
Ultimate Guide to Mastering Cabinet Refinishing Techniques
Are your cabinets looking outdated or worn, but you don’t want to invest in new ones? Cabinet refinishing is a cost-effective solution that can revitalize your kitchen or bathroom. In this guide, I will cover essential cabinet refinishing techniques, a step-by-step process to achieve a flawless finish, and troubleshooting tips for common issues. By following this guide, you can enhance your cabinetry, saving time and money while achieving professional-looking results that will transform your space. Let’s tackle the challenges of cabinet refinishing together and bring new life to your home.
Understanding Cabinet Refinishing Techniques for a Flawless Finish

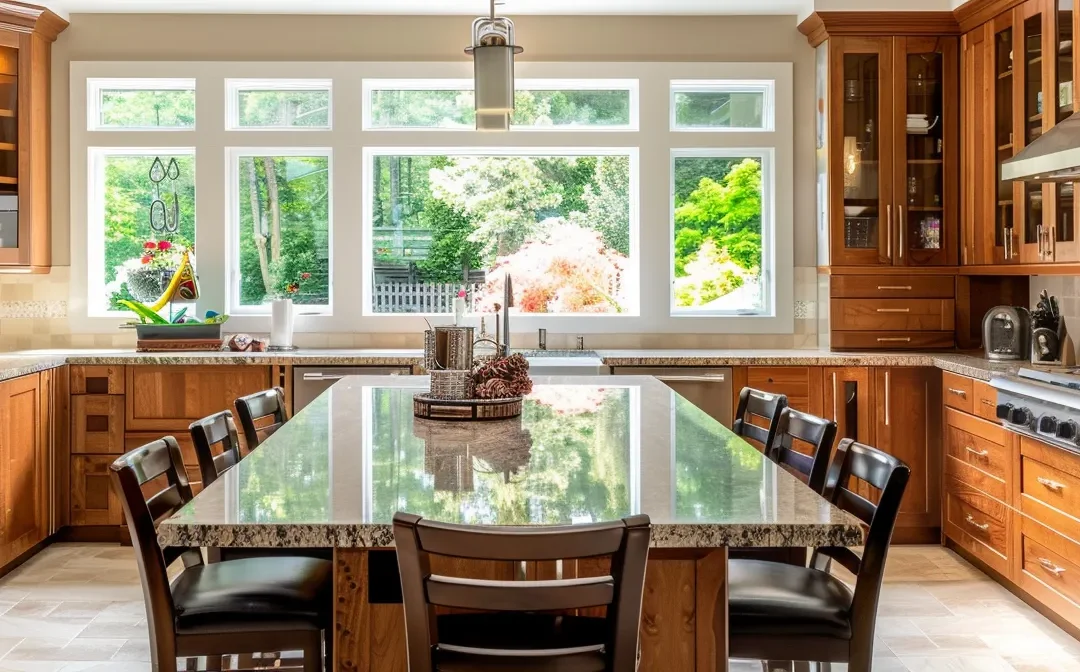
When tackling kitchen cabinet refinishing, understanding different types of cabinet finishes is essential, as they each offer unique benefits. I’ll discuss the essential tools required for effective cabinet painting, guide you in selecting the right paint or stain, and cover key preparation steps. Furthermore, I emphasize the importance of ensuring proper ventilation during the refinishing process to prevent wear and maintain a safe workspace. For expert refinishing services, consider contacting Hudson paint contracting.
Types of Cabinet Finishes and Their Benefits
When considering cabinet refinishing, selecting the right finish can significantly impact the appearance and durability of the cabinets. For instance, a wood stain offers a rich, natural look that enhances the grain, while a wax finish provides a soft sheen and protection against moisture, making it suitable for areas that may encounter mold. I often recommend taking the time to sand the surfaces properly before applying any finish, as this step ensures better adhesion and a smoother final result.
- Types of finishes: wood stain, wax, and more
- Benefits of each finish
- Importance of sanding for optimal results
Essential Tools for Cabinet Refinishing
To achieve remarkable results in refinishing kitchen cabinets, having the right tools is pivotal. I always keep a high-quality paintbrush and foam roller on hand for smooth application of finishes, as well as a good sander for preparing surfaces. Additionally, items like phosphatecleaner can effectively remove grease and dirt before I begin, ensuring that the paint adheres properly and the finished look is flawless. Don’t forget to have hinges and screws on standby, as you may need to replace them during the renovation process to achieve a consistent aesthetic throughout the cabinetry.
Selecting the Right Paint or Stain
Selecting the right paint or stain for your cabinet refinishing project can make all the difference in achieving a lasting, attractive finish. As I work with various wood types, I often consider how the chosen paint or stain interacts with the natural characteristics of the wood, as well as its exposure to potential dirt and mildew buildup. For example, I typically recommend a durable, mildew-resistant paint for kitchen cabinets, especially if the area is prone to moisture, and always ensure to use woodputty for any repairs to create a smooth application surface.
Preparing Your Cabinets for the Refinishing Process
Preparing your cabinets for the refinishing process is a fundamental step to ensure a smooth and professional finish. I always start by removing any hardware and cleaning the surfaces to eliminate dust and grease, as these can interfere with paint adhesion. Once the surfaces are clean, I use sandpaper to lightly scuff the existing finish, which helps the new paint or stain adhere better. If there are any gaps or imperfections, I apply caulk to fill them in before moving on to the application of paint. I recommend using a high-quality latex paint for durability and ease of application:
- Remove hardware and clean surfaces
- Use sandpaper to prepare cabinets
- Fill gaps with caulk
- Select a durable latex paint
Ensuring Proper Ventilation During Refinishing
Ensuring proper ventilation during the refinishing process of cabinetry is an often overlooked yet critical step. As I work on a kitchen remodel, I always make sure my workspace is well-ventilated to keep harmful fumes at bay. Using a fan or opening windows helps maintain airflow, ensuring that any soap or finish I apply dries smoothly without compromising air quality, while also protecting my health.
Now that we grasp the techniques of cabinet refinishing, it’s time to roll up our sleeves. Follow this step-by-step process to achieve that flawless finish you desire.
Step-by-Step Cabinet Refinishing Process

Cleaning and degreasing cabinets is my first step, ensuring surfaces are ready for refinishing. After that, I focus on sanding the cabinet surface effectively for optimal adhesion. Priming lays a smooth base before applying paint or stain, where I choose the right application method. Lastly, I emphasize the importance of allowing proper drying time between coats to achieve a flawless finish.
Cleaning and Degreasing Cabinets
To begin the cabinet refinishing process, cleaning and degreasing the surfaces is crucial, especially for kitchen cabinets, where grease and grime accumulate over time. I always make sure to remove cabinet doors for easier access and thorough cleaning. Using a solution of warm water and phosphatecleaner, I effectively remove dirt, grease, and any residues, particularly around the countertop areas and near drywall, ensuring a clean surface that promotes better adhesion for paint or stain.
| Step | Description |
|---|---|
| 1. Remove Cabinet Doors | Take off cabinet doors for easier cleaning and better access. |
| 2. Prepare Cleaning Solution | Mix warm water with phosphate cleaner to eliminate grease and grime. |
| 3. Clean Surfaces | Wipe down all surfaces, concentrating on areas near countertops and drywall. |
| 4. Rinse and Dry | Rinse the surfaces with clean water and allow them to dry completely before proceeding. |
Sanding the Cabinet Surface Effectively
Sanding the cabinet surface effectively is an essential step in the refinishing process that ensures proper adhesion of paint or varnish. I usually start with a medium-grit sandpaper to roughen the existing finish, allowing for a stronger bond with the new coat. If I encounter any imperfections, I apply putty to fill in gaps or dents, and using trisodium phosphate in my cleaning solution beforehand helps remove any residues that could interfere:
- Use medium-grit sandpaper for initial sanding.
- Apply putty to address imperfections.
- Clean surfaces with trisodium phosphate for better adhesion.
Applying Primer for a Smooth Base
Applying primer is a vital step in the cabinet refinishing process, as it creates a smooth base for subsequent paint layers. I often choose a high-quality primer that is resistant to humidity and suitable for the material of the cabinet doors. Using spray paint for the primer application not only ensures even coverage but also enhances the overall beauty of the finished product, making it look professional and appealing:
- Choose a high-quality primer to ensure durability.
- Consider humidity levels when selecting the primer.
- Use spray paint for an even and smooth application.
- Ensure the primer enhances the beauty of the cabinetry.
Choosing the Right Application Method for Paint or Stain
Choosing the right application method for paint or stain is crucial to achieving a professional finish in cabinet refinishing. I often opt for a microfiber roller for larger surface areas, particularly on drawer fronts, as it provides an even coat while minimizing texture. For areas that require precision, such as corners or detailed trim, I rely on a high-quality brush to ensure thorough coverage, especially when applying primer that enhances the longevity of the finish. When working on outdoor furniture refinishing, selecting a durable stain or paint resistant to moisture is essential for maintaining the cabinet’s appearance over time.
Allowing Proper Drying Time Between Coats
Allowing proper drying time between coats is crucial for achieving a durable, professional-looking finish when refinishing cabinets. I always ensure that the enamel paint or polyurethane has sufficient time to cure before applying the next layer, as this prevents the layers from lifting or peeling. Using masking tape around edges can help achieve clean lines while avoiding smudging, but it’s vital to remove the tape at the right moment to prevent damage to the paint. In my experience, I’ve found that following the cleaner manufacturer’s guidelines for drying times leads to optimal results and enhances the overall longevity of the finish.
After mastering the steps to refinish your cabinets, the real challenge lies in achieving a flawless finish. Follow these tips, and you’ll elevate your work to a level that impresses and endures.
Tips for Achieving a Flawless Finish

Achieving a flawless finish in furniture refinishing requires attention to several key techniques. I focus on ensuring even coverage by selecting the appropriate application tools, using brushes or rollers for different effects. Preventing common mistakes during the process is vital, as is incorporating a protective topcoat for longevity. I also emphasize the importance of vacuuming surfaces to remove dust, ensuring a pristine finish free of imperfections.
Techniques for Even Coverage
When refinishing cabinets, achieving even coverage is crucial for a polished and professional appearance. I find that using a high-quality microfiber roller works well for larger surfaces like cabinet doors, as it ensures a consistent coat while reducing brush strokes. For detailed areas, such as the edges or intricate designs, employing a fine brush helps applied finishes reach every nook, creating a seamless look. Always be mindful of any existing lead paint on older cabinets, as it may require specific safety precautions when refinishing kitchen cabinets or working with wood veneer surfaces:
- Use a microfiber roller for large surfaces.
- Employ a fine brush for detailed areas.
- Be cautious of lead paint on older cabinets.
- Ensure even application for a polished finish.
Preventing Common Mistakes During Application
Preventing common mistakes during the application of finishes is essential to achieve a remarkable result in your home improvement projects. I pay close attention to detail, ensuring that surfaces are properly prepared and cleaned before application to avoid issues like water damage or an uneven appearance. If I’m working on refacing kitchen cabinets, I always use a clean sponge to apply my finishes evenly, which helps enhance the wood grain and avoids any flaws that can detract from the overall look.
Using Brushes vs. Rollers for Different Effects
When deciding whether to use brushes or rollers for cabinet refinishing, each tool offers distinct advantages that can impact the overall look of your remodel. I typically opt for a high-quality brush when I need precision for detailed areas or when working around existing hardware and moldings, as it allows for controlled application, ensuring every corner receives adequate coverage. Conversely, for larger surfaces like cabinet doors, a roller enables me to apply paint quickly and achieve a smooth finish, especially when calculating the cabinet refacing cost, as efficiency is essential for keeping expenses down without sacrificing quality.
Incorporating a Protective Topcoat for Longevity
Incorporating a protective topcoat is essential for enhancing the longevity of refinished cabinets. I typically choose a durable, clear polyurethane topcoat to safeguard against scratches and stains, especially in high-traffic areas such as kitchens. This not only preserves the visual appeal of cabinet refacing but also ensures that surfaces remain easy to clean and maintain over time:
- Choose a durable clear polyurethane for protection.
- Apply topcoat in high-traffic areas for enhanced durability.
- Ensure easy cleaning and maintenance of refinished surfaces.
Even with the best techniques, problems can arise. Let’s look at common issues in cabinet refinishing and how to fix them.
Troubleshooting Common Cabinet Refinishing Issues

Dealing with common cabinet refinishing issues can make or break your project. I’ve encountered paint or stain runs and drips that require careful correction. Fixing uneven color or texture problems is essential for achieving a cohesive look, while solutions for sticking or chipping finishes help maintain durability. Lastly, I’ll explore effective methods for repairing scratches and dents after refinishing to ensure your cabinets look their best.
Addressing Paint or Stain Runs and Drips
When I notice paint or stain runs and drips during cabinet refinishing, I take immediate action to correct these issues for a flawless finish. A simple method I use involves gently sanding the affected area once the material has dried completely, which helps smooth out any uneven patches. After sanding, I carefully apply a touch-up coat of paint or stain to ensure the surface remains uniform, allowing me to maintain the professional appearance I strive for in every project.
Fixing Uneven Color or Texture Problems
When I encounter uneven color or texture problems during cabinet refinishing, I address them promptly to maintain a professional appearance. One effective approach I’ve found is to lightly sand the affected areas using fine-grit sandpaper, which smooths out inconsistencies and prepares the surface for an even coat. Following this, I apply a touch-up of the original paint or stain, ensuring the new layer blends seamlessly with the surrounding surfaces for a uniform finish that enhances the overall aesthetics of the cabinetry.
Solutions for Sticking or Chipping Finishes
When dealing with sticking or chipping finishes on cabinets, I recommend identifying the root cause, which often stems from inadequate surface preparation or humidity issues. Ensuring that surfaces are properly sanded and cleaned before applying paint or stain can dramatically improve adhesion and durability. If you encounter a sticking finish, lightly sanding the area and reapplying a thin layer of topcoat can resolve the problem, while using a moisture-resistant primer can help prevent future chipping, ensuring your cabinet refinishing project stands the test of time.
Repairing Scratches and Dents Post-Refinishing
Repairing scratches and dents after refinishing cabinets is a straightforward process that can restore the beauty of your wood surfaces. I typically assess the damage first; minor scratches may require just a gentle application of a touch-up marker or stain that matches the original finish. For deeper dents, I often use wood filler, applying it smoothly and allowing it to dry before sanding it down to blend seamlessly with the surrounding area. This attention to detail not only improves the visual appeal but also enhances the durability of the refinished cabinets.
Every cabinet tells a story, and with care, that story endures. Learn how to protect and preserve your newly refinished cabinets, ensuring their beauty lasts.
Maintaining Your Refinished Cabinets

To ensure the longevity and beauty of your refinished cabinets, I focus on best cleaning practices that maintain their appearance without causing damage. I also share periodic maintenance tips that contribute to lasting elegance, along with insights on recognizing when it’s time to refinish again. By following these guidelines, you can enjoy the full benefits of your cabinet refinishing efforts for years to come.
Best Cleaning Practices for Refinished Surfaces
To maintain the beauty of your refinished cabinets, I recommend using a gentle cleaning solution, such as warm water mixed with mild soap, to avoid damaging the finish. When cleaning, I utilize a soft, lint-free cloth to wipe down the surfaces, focusing on high-traffic areas that may accumulate dirt and grease. Regular maintenance, including periodic gentle cleaning, helps preserve the finish and keeps your cabinetry looking fresh for years.
Periodic Maintenance Tips for Long-Lasting Beauty
To maintain the beauty of your refinished cabinets, I recommend performing regular cleaning using a soft, lint-free cloth and a gentle mixture of warm water and mild soap. This approach not only helps eliminate dirt and grease but also protects the finish from wear over time. Additionally, I suggest checking cabinets for any signs of damage or wear periodically, which allows you to address minor issues before they escalate, ensuring your refinished surfaces remain stunning and last for years to come.
Recognizing When to Refinish Again
Recognizing when to refinish your cabinets again requires careful observation of their condition. I recommend looking for signs such as chipping, fading, or water damage, as these indicate that the finish has worn away and needs attention. Additionally, if you notice increased difficulty in cleaning, it might be time to consider a refinishing project to restore both the appearance and protection of your cabinetry.
Your cabinets can be a canvas for creativity. Let’s look at some inspiring projects and ideas that will transform your space and breathe new life into your home.
Inspiring Cabinet Refinishing Projects and Ideas

Trending colors and finishes can transform modern kitchens, making a bold statement or adding subtle elegance. I will share case studies of successful refinishing transformations that inspire creativity in your space. Additionally, I’ll cover innovative techniques to customize your cabinets, ensuring they reflect your style. Lastly, discover budget-friendly refinishing options that cater to various financial needs while delivering impressive results.
Trending Colors and Finishes for Modern Kitchens
In my experience, trending colors and finishes for modern kitchens often include soft hues like sage green and navy blue, which add a touch of sophistication and warmth to the space. Pairing these colors with satin or matte finishes allows the natural beauty of the cabinetry to shine while providing a sleek look that is easy to maintain. I’ve found that opting for contrasting finishes, such as a darker color for the lower cabinets and a lighter tone for the upper ones, can create a visually appealing effect that enhances the overall design of the kitchen.
Case Studies of Successful Refinishing Transformations
Throughout my career in cabinet refinishing, I’ve had the pleasure of transforming numerous spaces, each with its unique challenges and rewards. One notable project involved revamping a client’s outdated kitchen with a fresh coat of soft blue paint, which completely revitalized the ambiance and provided a modern touch. By incorporating durable finishes and meticulous attention to detail, we not only enhanced the visual appeal but also ensured the cabinets would withstand the wear of daily use, showcasing the significant impact of a well-executed refinishing project.
Innovative Techniques to Customize Your Cabinets
Customizing your cabinets can elevate the overall aesthetic and functionality of your space. I often recommend incorporating unique hardware, such as vintage-style knobs or sleek modern handles, which can significantly change the look of cabinetry without extensive renovations. Additionally, experimenting with cabinet painting techniques, like distressing or color blocking, allows homeowners to express their personal style while enhancing the visual appeal of their kitchens or bathrooms:
- Incorporating unique hardware to change the look
- Using cabinet painting techniques like distressing
- Experimenting with color blocking for personalization
Budget-Friendly Refinishing Options for Every Home
Budget-friendly refinishing options can significantly enhance your cabinetry without breaking the bank. I often suggest using paint instead of stain for an eye-catching transformation, as it tends to cover imperfections more effectively while providing a fresh and modern look. Additionally, refinishing existing hardware or opting for affordable but stylish new knobs and handles can elevate the overall appearance, demonstrating that even small changes can make a substantial impact:
| Option | Description |
|---|---|
| Painting Cabinets | Choose paint for a cost-effective, fresh look that covers imperfections. |
| Refinishing Hardware | Update existing knobs and handles for a stylish upgrade without high costs. |
| DIY Techniques | Utilize do-it-yourself methods for cost savings and a personalized touch. |
Essential Takeaways for Successful Cabinet Refinishing Techniques
Mastering cabinet refinishing techniques is essential for achieving a stunning and durable finish in both residential and commercial spaces. By understanding the various finishes, using the right tools, and following meticulous preparation steps, you can ensure a professional appearance that enhances your cabinetry’s longevity. Emphasizing proper ventilation and allowing adequate drying time also play critical roles in achieving flawless results. Ultimately, applying these insights empowers you to transform and maintain your cabinets, showcasing the value of quality craftsmanship in your home or business environment.